Welcome to our guide on mini sewing machine manuals! This section introduces you to the essential resources for operating and understanding your compact sewing machine․ Whether you’re a beginner or an experienced user, these manuals provide critical information for safe and effective operation․ Learn how to set up, thread, and troubleshoot your machine with ease․ Discover the key features and maintenance tips to ensure optimal performance․ This guide will walk you through everything you need to know about mini sewing machine manuals and their importance in your sewing journey․
1․1 Overview of Mini Sewing Machines
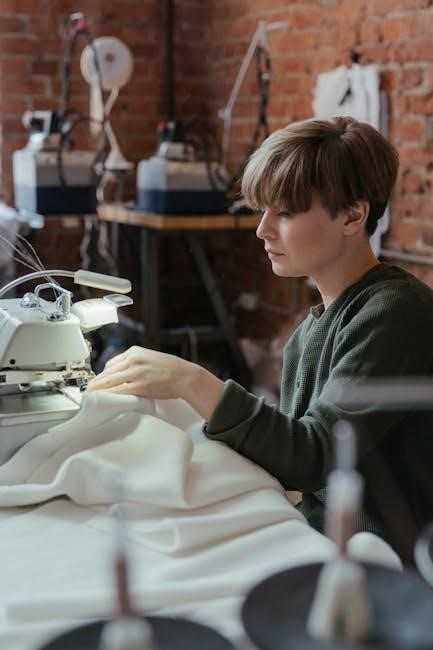
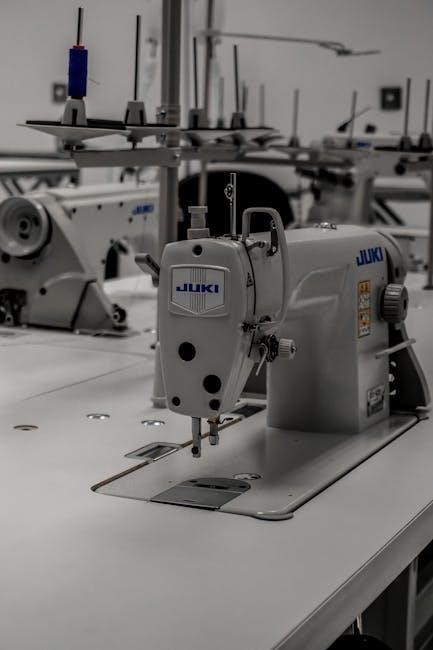
Mini sewing machines are compact, portable devices designed for basic sewing tasks․ Ideal for small repairs, crafts, and household use, they offer simplicity and convenience․ Models like the FHSM-505 and Easy Home MS-201 feature lightweight designs, easy-to-use controls, and essential stitching options․ Perfect for beginners and experienced sewers alike, these machines combine practicality with affordability․
1․2 Importance of the Manual for Operation
The manual is crucial for understanding your mini sewing machine’s operation․ It provides step-by-step guides for setup, threading, and troubleshooting․ Reading the manual ensures safe usage, helps prevent damage, and maximizes machine performance․ Always refer to it before starting any project to avoid errors and ensure optimal results․
Key Features of Mini Sewing Machines
Mini sewing machines are compact, lightweight, and portable, designed for home use․ They feature basic functionality, including a foot pedal for speed control and multiple stitch options․ Popular models like the Easy Home MS-201 offer durability and ease of use, making them ideal for small projects and repairs․
2․1 Compact Design and Portability
Mini sewing machines are designed with a compact and lightweight build, making them highly portable․ Their small size allows easy storage and transport, perfect for home use or crafting on the go․ Models like the Easy Home MS-201 emphasize convenience without compromising performance, ensuring versatility for various sewing tasks․
2․2 Basic Functionality for Household Use
Mini sewing machines offer essential features for simple household tasks, such as straight and zigzag stitching․ They are ideal for repairing clothes, sewing small projects, or crafting․ Many models include a foot pedal for speed control, making them user-friendly for beginners and experienced sewers alike․ Their basic yet efficient design ensures versatility for everyday use․
2․3 Examples of Popular Models (e․g․, Easy Home Mini Sewing Machine MS-201)
Popular models like the Easy Home Mini Sewing Machine MS-201, Janome 525A Sew Mini, and Magicfly Dual Speed Mini Portable Sewing Machine are known for their compact designs and user-friendly features․ These models are ideal for household use, offering basic stitching options and portability, making them perfect for small sewing projects and repairs․
Safety Guidelines and Precautions
- Always keep fingers away from moving parts and use proper needles․
- Avoid exposing the machine to water or operating it with a damaged cord․
- Read the manual thoroughly and follow all safety instructions carefully․
3․1 Reading the Manual Before Use
Reading the manual before using your mini sewing machine is crucial for safe and effective operation․ Understand safety guidelines, proper setup, and maintenance tips to avoid damage or injury․ The manual provides detailed instructions for threading, troubleshooting, and optimizing performance․ Always save it for future reference to ensure longevity and functionality of your machine․
3․2 Keeping Fingers Away from Moving Parts
Always keep fingers away from moving parts, especially the needle and bobbin areas, to prevent injuries․ Use tools or fabric scraps for handling materials, never your hands․ This precaution ensures safe operation and avoids accidents, as moving parts can cause serious harm if not respected․ Stay vigilant during use․
3․3 Using the Correct Needle and Accessories
Using the correct needle and accessories is crucial for proper machine function and safety․ Always install the needle with the flat side facing the front․ Use only recommended accessories to avoid damage or malfunction․ Refer to your manual for compatible options and ensure all parts are securely fitted before operation․
3․4 Avoiding Water Exposure
Avoid exposing your mini sewing machine to water, as it is an electrical appliance․ Moisture can damage internal components or cause safety hazards․ Keep the machine dry and clean it with a soft, dry cloth․ Never submerge it in water or use wet accessories to ensure optimal performance and longevity․
Setting Up and Preparing the Machine
Unbox and inspect your mini sewing machine, ensuring all components are included․ Familiarize yourself with the parts and attachments before assembly․ Follow manual instructions for proper setup and installation of batteries or power adapters to ensure safe and efficient operation․
4․1 Unboxing and Initial Inspection
When unboxing your mini sewing machine, carefully inspect all components for damage․ Verify the inclusion of the machine, power adapter, needles, and accessories․ Ensure the device is free from visible damage before proceeding with setup․ This step ensures functionality and safety, as outlined in the manual․
4․2 Understanding the Components and Attachments
Familiarize yourself with the machine’s components, such as the on/off switch, thread pin, spool, bobbin, and stitch selector․ Check for included accessories like needles, extra bobbins, and a foot pedal․ Understanding these parts is essential for proper operation, as detailed in the manual․
4․3 Assembly and Battery or Power Adapter Installation
Begin by inserting 4 AA batteries into the battery compartment or using the DC power adapter․ Ensure the machine is fully assembled with all parts securely attached․ Follow the manual’s guidance for proper installation to avoid damage․ Always check that the machine is correctly threaded before turning it on․
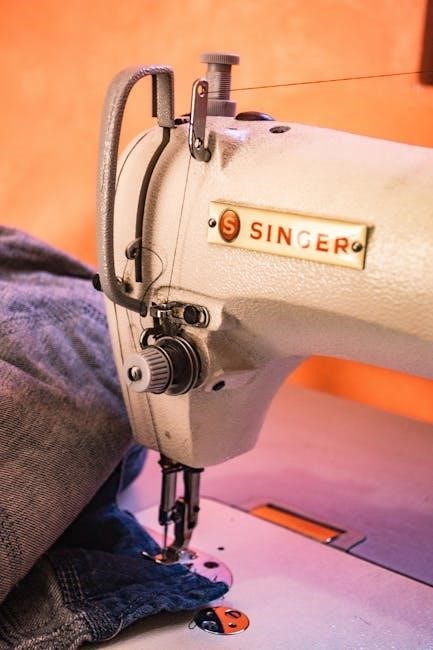
Threading the Mini Sewing Machine
Proper threading is essential for smooth stitching․ Follow the manual’s step-by-step guide to thread the upper thread and bobbin correctly․ Ensure proper tension and fabric alignment for optimal results․
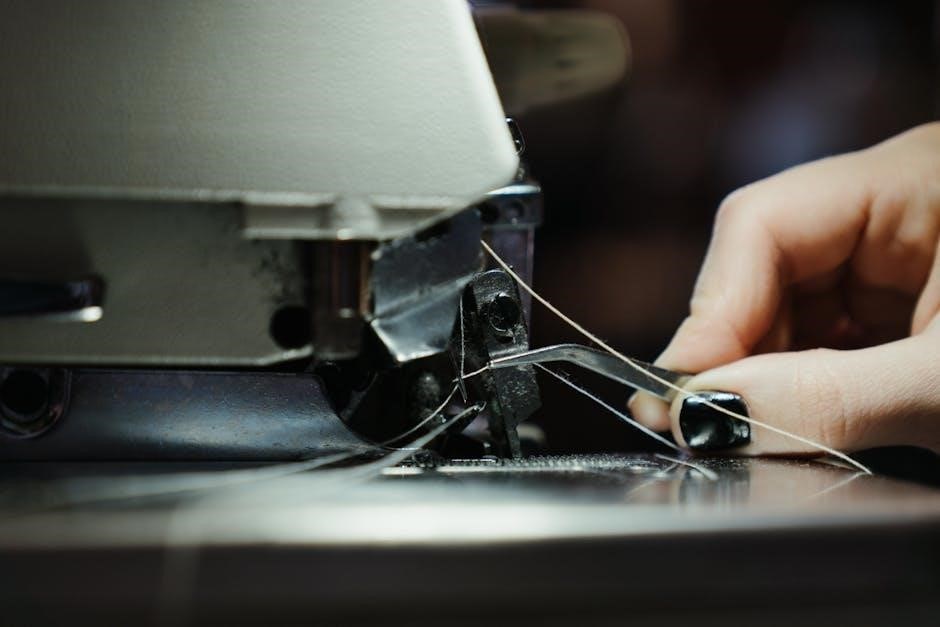
5․1 Step-by-Step Guide to Threading the Upper Thread
Place the spool on the thread pin and pull about 4 inches of thread․ Guide the thread through the tension guide, then insert it into the needle bar․ Leave a small loop before cutting excess․ Follow the manual’s path for proper seating․ Ensure the thread is taut but not too tight for smooth operation․ End near the bobbin area for easy stitching․
5․2 Threading the Bobbin and Ensuring Proper Tension
Place the thread through the bobbin winder and wind evenly․ Cut excess thread, then insert the bobbin into the bobbin case․ Pull thread gently to ensure proper tension․ Adjust the bobbin case tension screw if stitches are uneven․ Always refer to the manual for specific model guidance to avoid threading errors and ensure smooth stitching․
5․3 Tips for Smooth Threading
Always use the correct thread type and size for your machine․ Ensure the bobbin is properly seated and aligned․ Gently pull the thread after insertion to avoid tangles․ Use a needle threader for ease․ Keep the machine clean to prevent thread buildup․ Follow manual guidelines for optimal threading results every time․
Basic Operations and Stitching
Learn to operate your mini sewing machine with ease․ Start by turning it on, then begin stitching․ Use the foot pedal to control speed and ensure fabric alignment for straight, consistent seams․
6․1 Turning On the Machine and Starting a Stitch
Ensure the machine is off before inserting batteries or connecting the power adapter․ Press the on/off switch to activate it․ Place fabric under the needle, aligning edges carefully․ Gently press the foot pedal to begin stitching, maintaining steady control for consistent results․ Always ensure proper threading before starting․
6․2 Using the Foot Pedal for Speed Control
Press the foot pedal gently to start the machine and regulate stitching speed․ Apply gentle, consistent pressure for smooth operation․ Avoid forcing the pedal, as it may damage the mechanism․ For models with dual-speed functionality, refer to the manual for specific settings to customize your sewing experience effectively․
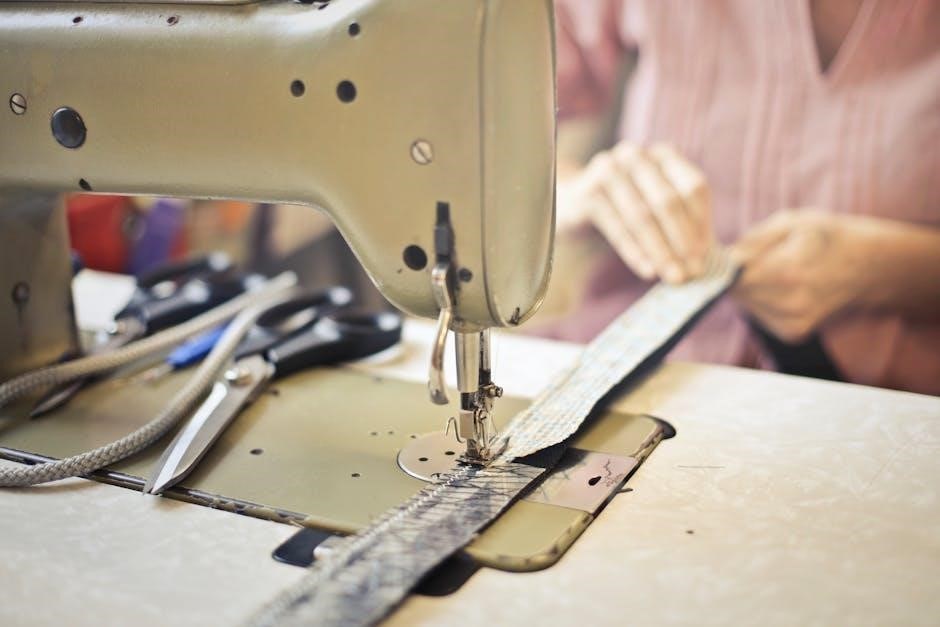
6․3 SewingFabric Placement and Alignment
6․3 Sewing Fabric Placement and Alignment
Proper fabric placement is essential for smooth sewing․ Align the fabric edges evenly under the presser foot․ Use the built-in guides or markings on the machine to ensure straight stitching․ Gently hold the fabric steady, maintaining a consistent flow without stretching or pulling․ Proper alignment prevents uneven stitches and ensures professional results․
Troubleshooting Common Issues
Troubleshooting common issues with your mini sewing machine involves addressing thread breaks, jams, uneven stitches, and power problems․ Refer to the manual for detailed solutions and maintenance tips․
7․1 Thread Breaking or Jamming
Thread breaking or jamming is a common issue․ Check for incorrect threading, improper tension, or using the wrong needle․ Gently remove jams, rethread the machine, and ensure the bobbin is correctly seated․ Use the manual’s guidance to adjust settings and prevent future occurrences․ Regular cleaning and oiling can also help․
7․2 Uneven or Loose Stitches
Uneven or loose stitches can occur due to incorrect thread tension, improper needle alignment, or using the wrong needle type․ Adjust the tension settings, ensure the needle is correctly installed, and verify the thread is properly threaded․ Refer to the manual for specific guidance on achieving consistent stitch quality and resolving the issue․
7․3 Machine Not Turning On
If the machine fails to turn on, check the power source․ Ensure batteries are correctly inserted or the power adapter is properly connected․ Verify the on/off switch is in the correct position․ Consult the manual for troubleshooting steps, such as checking for damaged cords or faulty connections, to resolve the issue effectively․
Accessories and Maintenance
Mini sewing machines come with essential accessories like bobbins, needles, and foot pedals․ Regular cleaning and oiling ensure smooth operation, while proper storage maintains longevity and performance․
- Accessories often include zipper feet, extension tables, and buttonhole attachments․
- Maintenance involves cleaning lint, oiling moving parts, and storing the machine in a dry place․
8․1 Standard Accessories Included
Mini sewing machines typically come with essential accessories to enhance functionality․ These include bobbins, needles, foot pedals, zipper feet, extension tables, and buttonhole attachments․ Additional items like thread spools, screwdrivers, and dust covers may also be provided, ensuring versatility and convenience for various sewing tasks․
- Bobbins and needles for consistent stitching․
- Foot pedals for speed control․
- Zipper and buttonhole attachments for specialized projects․
8․2 Cleaning and Oil
Regular cleaning and oiling are crucial for maintaining your mini sewing machine’s performance․ Use a soft cloth to remove dust and debris․ Apply a few drops of sewing machine oil to moving parts monthly; Avoid using excess oil to prevent attracting dust․ Follow manual guidelines for specific oiling points to ensure smooth operation․
- Clean with a soft, dry cloth․
- Oil moving parts every month․
- Use recommended sewing machine oil․
8․3 Storing the Machine Properly
Store your mini sewing machine in a cool, dry place to prevent damage․ Clean and oil the machine before storage․ Use a protective cover to shield it from dust․ Avoid extreme temperatures or humidity․ Store it upright to maintain balance and ensure all parts remain functional for future use․
- Keep in a dry, cool environment․
- Clean and oil before storing․
- Use a protective cover․
Advanced Features and Capabilities
Explore advanced features of mini sewing machines, including multiple stitch options, buttonhole attachments, and dual speed functionality for enhanced creativity and efficiency in your projects․
9․1 Multiple Stitch Options
Mini sewing machines often feature multiple stitch options, including straight, zigzag, and decorative patterns, allowing for versatility in sewing projects․ These stitches cater to various fabrics and tasks, enhancing creativity and efficiency for both beginners and experienced users, as detailed in the manual․
9․2 Buttonhole Attachment
The buttonhole attachment is a convenient feature on select mini sewing machines, allowing users to sew precise buttonholes effortlessly․ This attachment simplifies the process of creating uniform buttonholes, ideal for garments and crafts․ The manual provides detailed steps for using this attachment effectively, enhancing your sewing experience with professional results․
9․3 Dual Speed Functionality
Dual speed functionality allows users to adjust stitching speed, offering more control over sewing projects․ This feature is ideal for delicate fabrics or heavy materials, ensuring precise stitching․ Refer to your manual for specific instructions on activating and using this feature effectively for various sewing tasks and projects․
Comparison with Other Mini Sewing Machines
This section compares features, portability, and functionality of various mini sewing machines, highlighting models like the Magicfly Dual Speed and Janome Sew Mini for tailored sewing experiences․
10․1 Popular Models and Their Features
Explore top models like the Magicfly Dual Speed, Janome Sew Mini, and Easy Home MS-201․ These machines offer features such as dual-speed control, portability, and multiple stitch options, catering to both beginners and experienced users․ Their compact designs and user-friendly interfaces make them ideal for household and crafting projects, ensuring versatility and ease of use․
10․2 User Reviews and Recommendations
Users praise mini sewing machines for their portability and ease of use․ Models like the Magicfly Dual Speed and Janome Sew Mini are highly rated, with users appreciating their compact designs and versatility․ Many recommend these machines for beginners and small projects, highlighting their affordability and user-friendly features․ Ratings often exceed 8․5/10․
Downloading and Referencing the Manual
Download mini sewing machine manuals as PDFs from official websites or trusted sources․ Referencing them ensures proper setup, threading, and troubleshooting․ Popular models often have manuals available for free, making it easy to access essential information anytime․ Save the manual for future reference to maintain your machine effectively․
11․1 Sources for Downloading the PDF Manual
Mini sewing machine manuals are available on official manufacturer websites, such as Janome or Brother, and trusted platforms like ManualsLib or Scribd․ Online marketplaces like Amazon or eBay often include PDF manuals with purchased machines․ Additionally, forums and sewing communities share downloadable resources for various models, ensuring easy access to instructions․
11․2 Navigating the Manual for Specific Information
Most mini sewing machine manuals feature a table of contents for easy navigation․ Use the index to locate specific topics like threading, troubleshooting, or maintenance․ Sections are often categorized for quick access, and diagrams accompany instructions for clarity․ This structured approach ensures users can find information efficiently, enhancing their overall experience with the machine․
11․3 Importance of Saving the Manual
Saving the manual is crucial for future reference and troubleshooting․ It provides essential guidelines, maintenance tips, and part details․ Retain it securely to ensure easy access for understanding features and proper use․ This guarantees optimal performance and longevity of your mini sewing machine․
Mastering your mini sewing machine begins with understanding its manual․ Practice regularly, explore its features, and maintain it well․ Happy sewing and creating!
12․2 Encouragement to Practice and Explore
12․1 Summary of Key Takeaways
Mini sewing machine manuals are essential for safe and effective operation․ They guide users through setup, threading, and basic functions while emphasizing safety․ Regular maintenance and proper storage ensure longevity․ Whether you’re a beginner or experienced, these manuals provide the foundation for mastering your mini sewing machine and unlocking its full potential creatively․